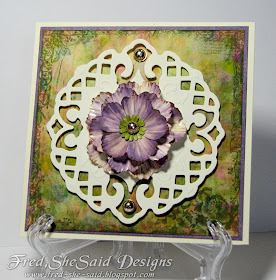
Here is a an example of using Distress Inks to colour a flower. I used "A Lovely Blossom & Butterfly" set but used it as a template, I am colouring the other side of the paper after I cut them out. Another great thing about this, you don't have to be as careful cutting out the flower and leaves... I even exaggerated the jaggyness of the petals. For this card, I also used one of Donna's awesome papers from her Designer Extreme Vol. 2 CD ( Bearly Mine Designs). I used Ranger Distress Inks Dusty Concord and Antique Linen ( and Peeled Paint on green bit). I antiqued the gold dew drops by changing the tone with a peach BIC Mark It and then dabbed on some Platinum Stickles.
Here is another example. I used some leftover leaves from Fred's Flowers V1 . Distressed Inks: Scattered Straw and Worn Lipstick. Peeled Paint on leaves.
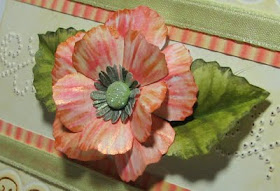
All the examples I edged the flowers and petals with pearlescent paints.
TUTORIAL!!!! :D
I want to show you how I distress inked the flowers.
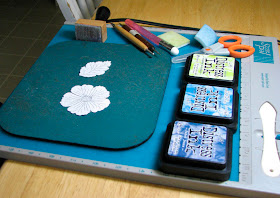
Here's my supplies:
-Scor-mat or craft sheet
-Some cut flowers and leaves - I am using a 27 lb paper, if ink shows through on other side, try draft mode on your printer.
-Distress Inks: Shabby Shutters, Peeled Paint, Broken China, Faded Jeans
-Blending Tools and a foam pad ( or use cosmetic sponges )
-Water brush ( only used to darken the leaves ) OPTIONAL
-fantastix or style stix or a small eye makeup applicator, q-tip might work.
-Large embossing stylus( or something round like a pencil eraser), Small stylus or a skinny crochet hook or something similar.
-Foam pad or mouse pad
Please excuse the grossness of my mouse pad. ick shudder... just don't look too close. LOL
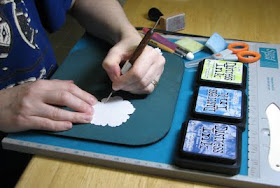
Draw/Emboss multiple lines on petals - BOTH sides.
Like so...
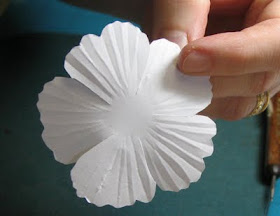

Dab blender tool into Shabby Shutters pad. Swirl on craft sheet or scor-mat ( shiny side) to blend into foam then apply to petals from center out - repeat to build up colour.. you may need to pick up more ink. This layer I make sure there is still white showing. Notice how the embossed lines take the ink.
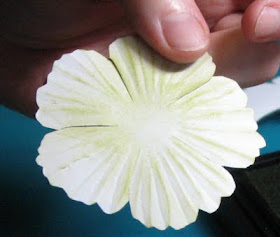
NOTE: Now for the peach flower, I went over the petals the same way with another colour ( first Scattered Straw then Worn Lipstick). You can apply another color the same way. Instead, I wanted a more streaky flower so....
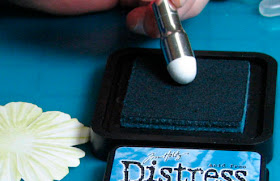
I have these cool foam brushes called Style Stix. I dabbed it into Broken China.
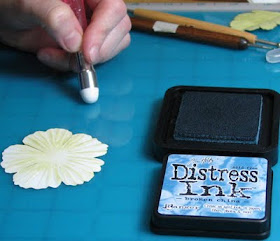
I blended off on the scor-mat then started making streaks on the petals - center out, going back over areas until the I got the look I wanted. I didn't show you but I repeated colouring the flower with the style stix using Faded Jeans.
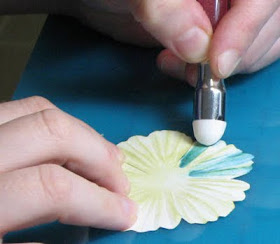
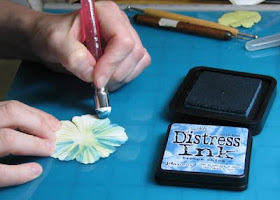
I used the large stylus to push the center in to make the petals pop up.
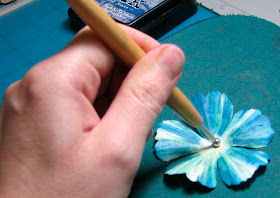
I like to use my fingers to bend and pinch the petals, they are your best tool ;)

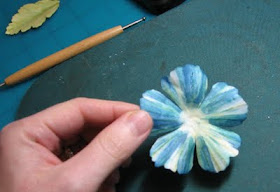
Here is one layer of the flower. You can arrange flowers however you like, just one layer, try multiple sizes and layers.
NOW ON TO the LEAVES:
I embossed the vein lines and creased down the center and bent & moulded using my fingers.

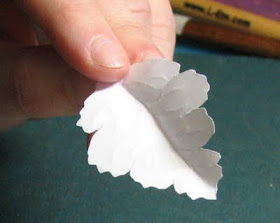
I inked with Shabby Shutters, another good colour is Peeled Paint.
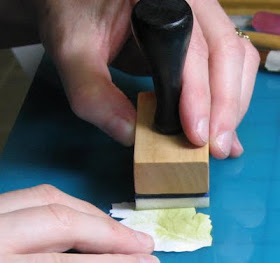
I shaded the center using a darker ink... Peeled Paint.
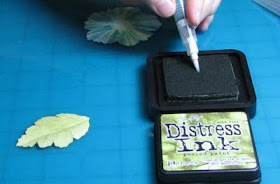
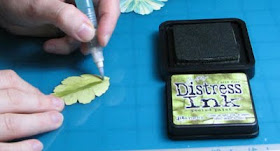
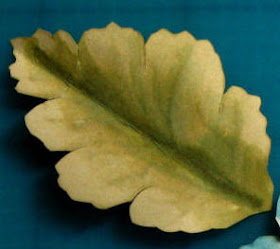
The END.
I hope I inspired you! You could easily vary this using watercolour paints, acrylics, other inks, twinkling H2O's, the skies the limit. Have fun and .... Have a great day!
:)* Fred

Great Tut, Tracey.
ReplyDeleteVery clear to understand.
Love the card you made with it.
Fabulous tutorial. Thank you.
ReplyDeleteClare x
Fabulous tutorial, thankyou Tracey.
ReplyDeleteI love the card you made with it.
Hugs
Christine xx
Wow! This is fantastic! I hope to try this soon.
ReplyDeleteWow these flowers are fabulous... thanks for the tut I'll have to give it a try!
ReplyDeletestunning results! great tut!
ReplyDeletegreat tutorial! I love the card you show!
ReplyDeletewheeee tracey- amazing work and nice step by step instructions
ReplyDeletecarol
Great tutorial and what a gorgeous card.
ReplyDeleteSue xx
Great tutorial Tracey. I always wondered how you done the flowers with distress inks. They look amazing! I might just have to have a go at this but first I need to get some more distress inks cos I only have 3. well actualy 2 because I can't find the third one lol.
ReplyDeleteHugs Lora x
Very beautiful card!!
ReplyDeleteThanks for the tutorial. It helps me so much to "see" how things are done! And your images are wonderful!
ReplyDeleteAwesome, thanks so much, your cards are always so pretty.
ReplyDeleteWhat beautiful flowers! Thanks for the tutorial!
ReplyDeleteHow beautiful; love your tutorial! I really love those foam brushes!! LOL
ReplyDeleteGreat tutorial and easy to follow! I believe I will try this...the card is gorgeous.
ReplyDeleteVicki
This is so terrific, Tracey! I can't wait to try it. Beautiful coloring :) best, ~Jeni
ReplyDeleteWhat a fab tutorial, thanks very much :)
ReplyDeleteI enjoyed your tutorial. I'm very interested in acquiring those really cool sponge applicators, Can you share where you got them?
ReplyDeleteThanks in advance,
Rita